Computer Controlled Cutting
Press and fit game
 |
LEVEL: |  |
|---|---|---|
| SKILLS: |  |
|
| TIME: |  |
|
| MACHINE: |  |
|
| SOFTWARE: | FUSION360 |
| TOOLS. | ||||||||||||||
|---|---|---|---|---|---|---|---|---|---|---|---|---|---|---|
|
|
|
|
|
|
|||||||||
| BOM: | |
|---|---|
| component name | link |
| component | link |
| component | link |
| component | link |
| component | link |
| component | link |
| component | link |
| component | link |
| component | link |
1. SECTION 1: 3D model with Fusion 360
1.1 Download and install software
Intro about fusion 360 (TO DO):
1.1 Model PART 1
To realize this game it's useful to draw the puzzle pieces in a parametric way: in this manner you will be able to obtain many different shapes with a single model. But if you want you can also draw without using parameters.
This game consists of two parts:
-PART 1: a series of geometric pieces (changing the parameter of the number of sides changes the geometric shape)
-PART 2: joint (by changing the angle value, different joints are obtained).
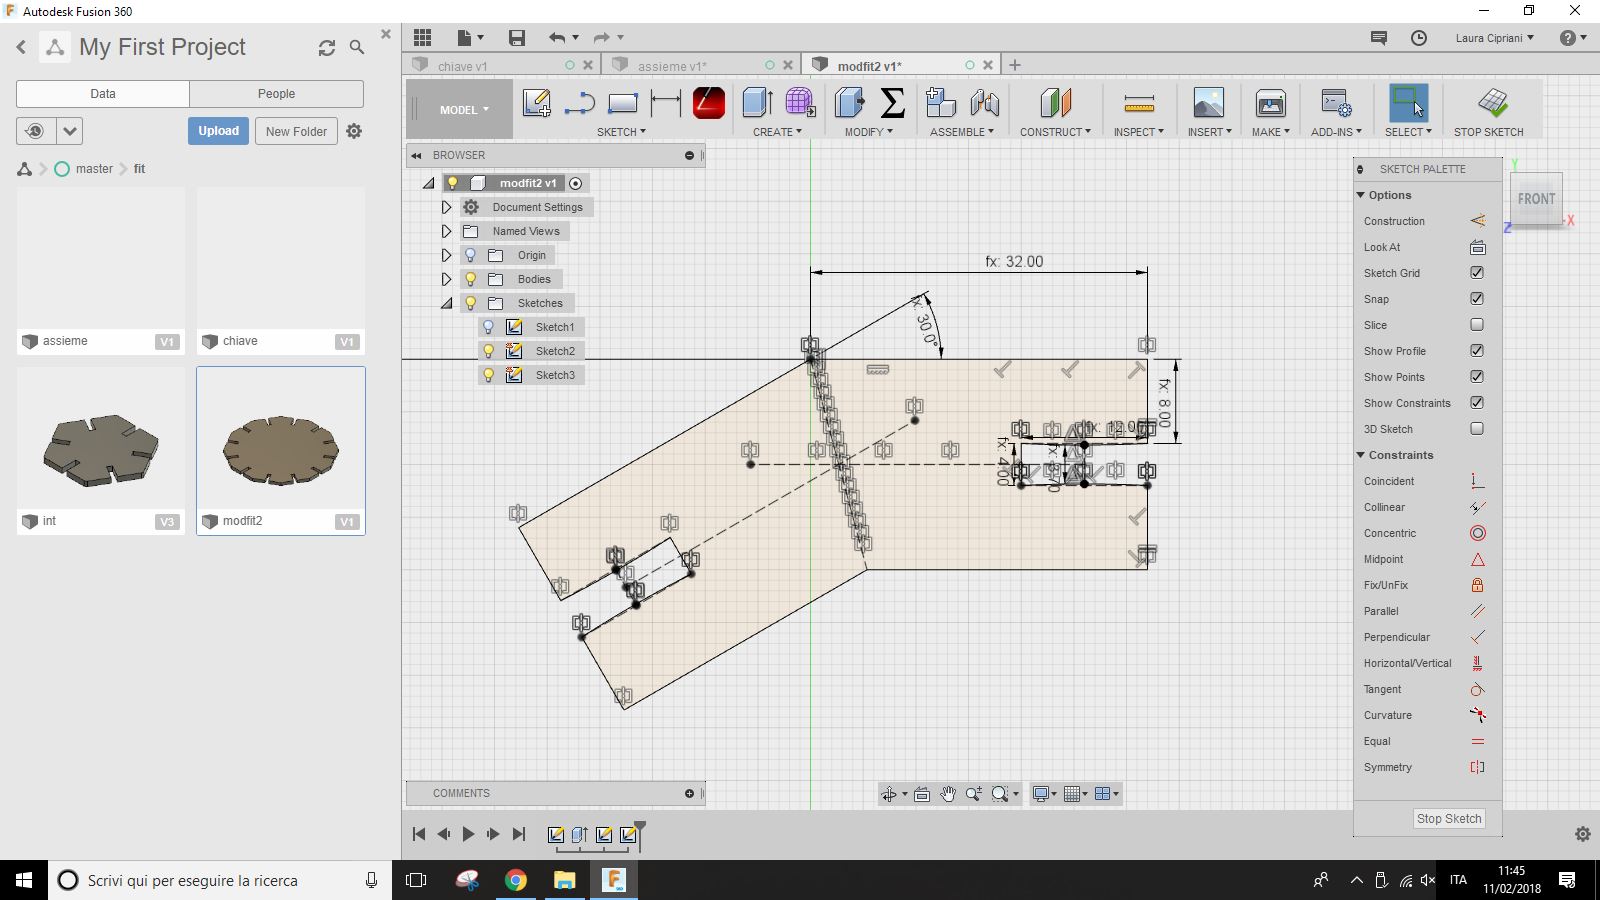
 You can start modeling the joint in order to constrain and parameterize the parts of the piece based on the thickness.
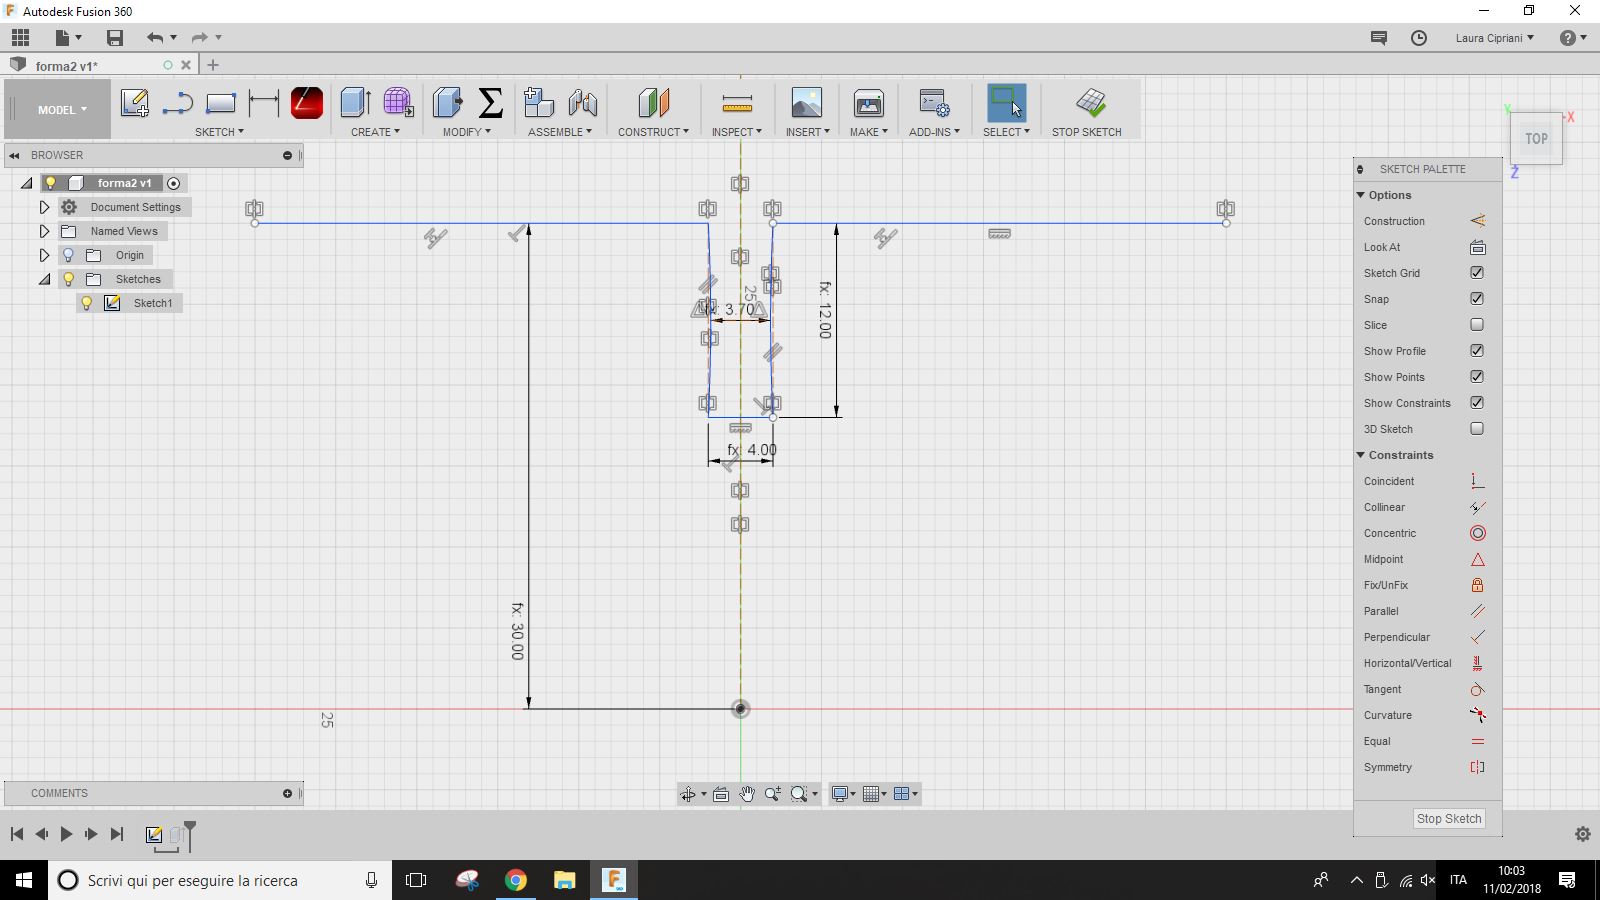 I later built this figure with the circular pattern command. I then made the end points of the sides coincident.
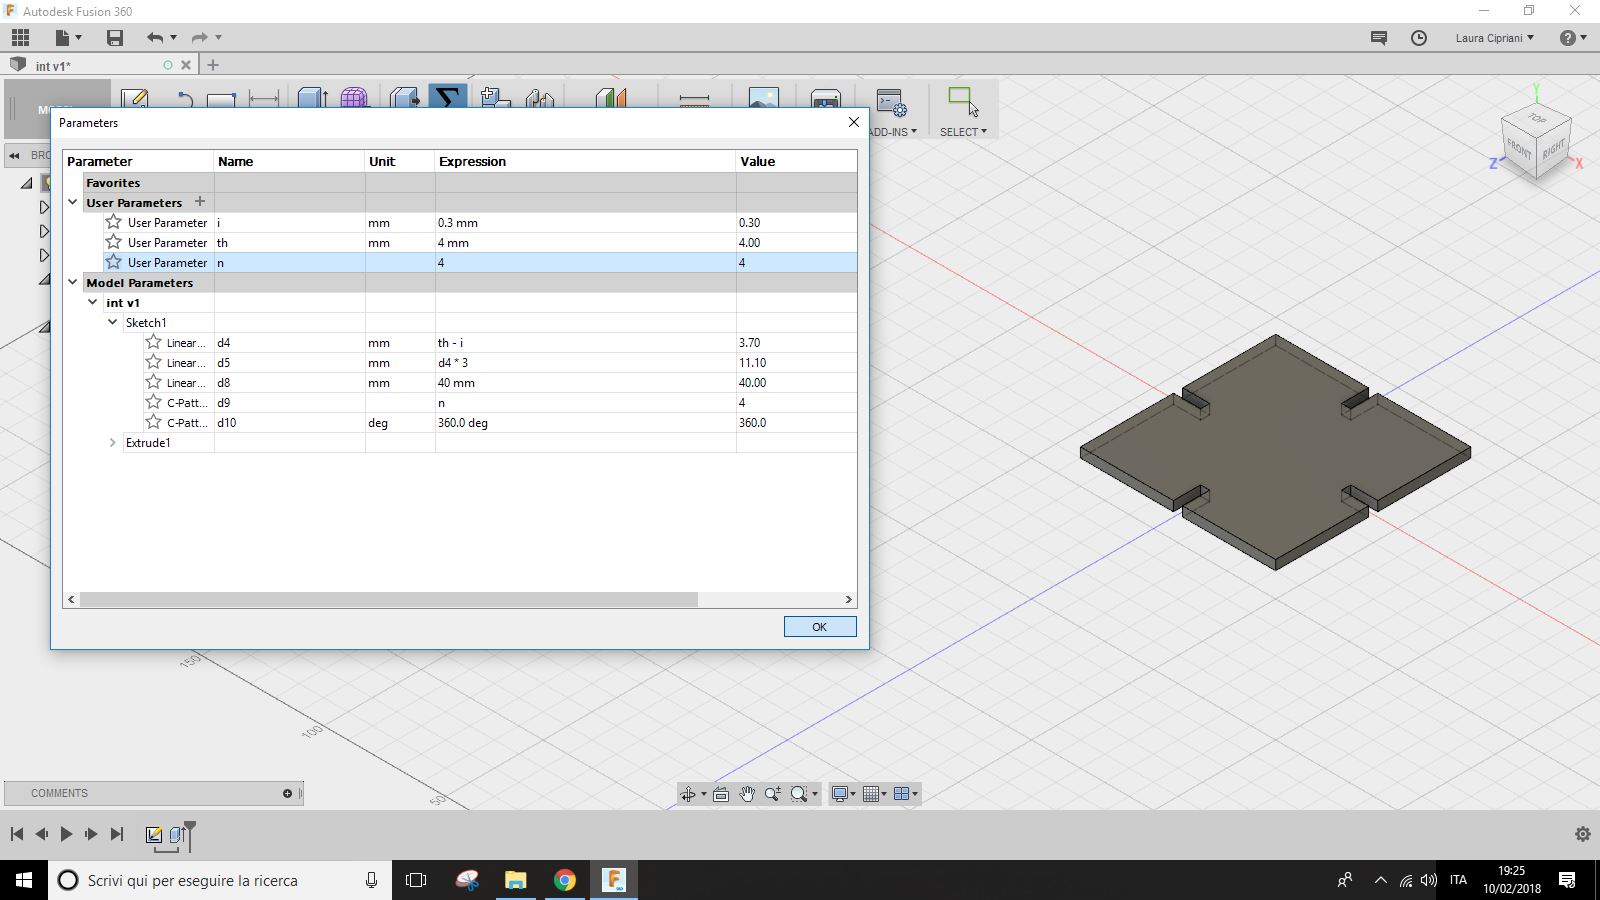
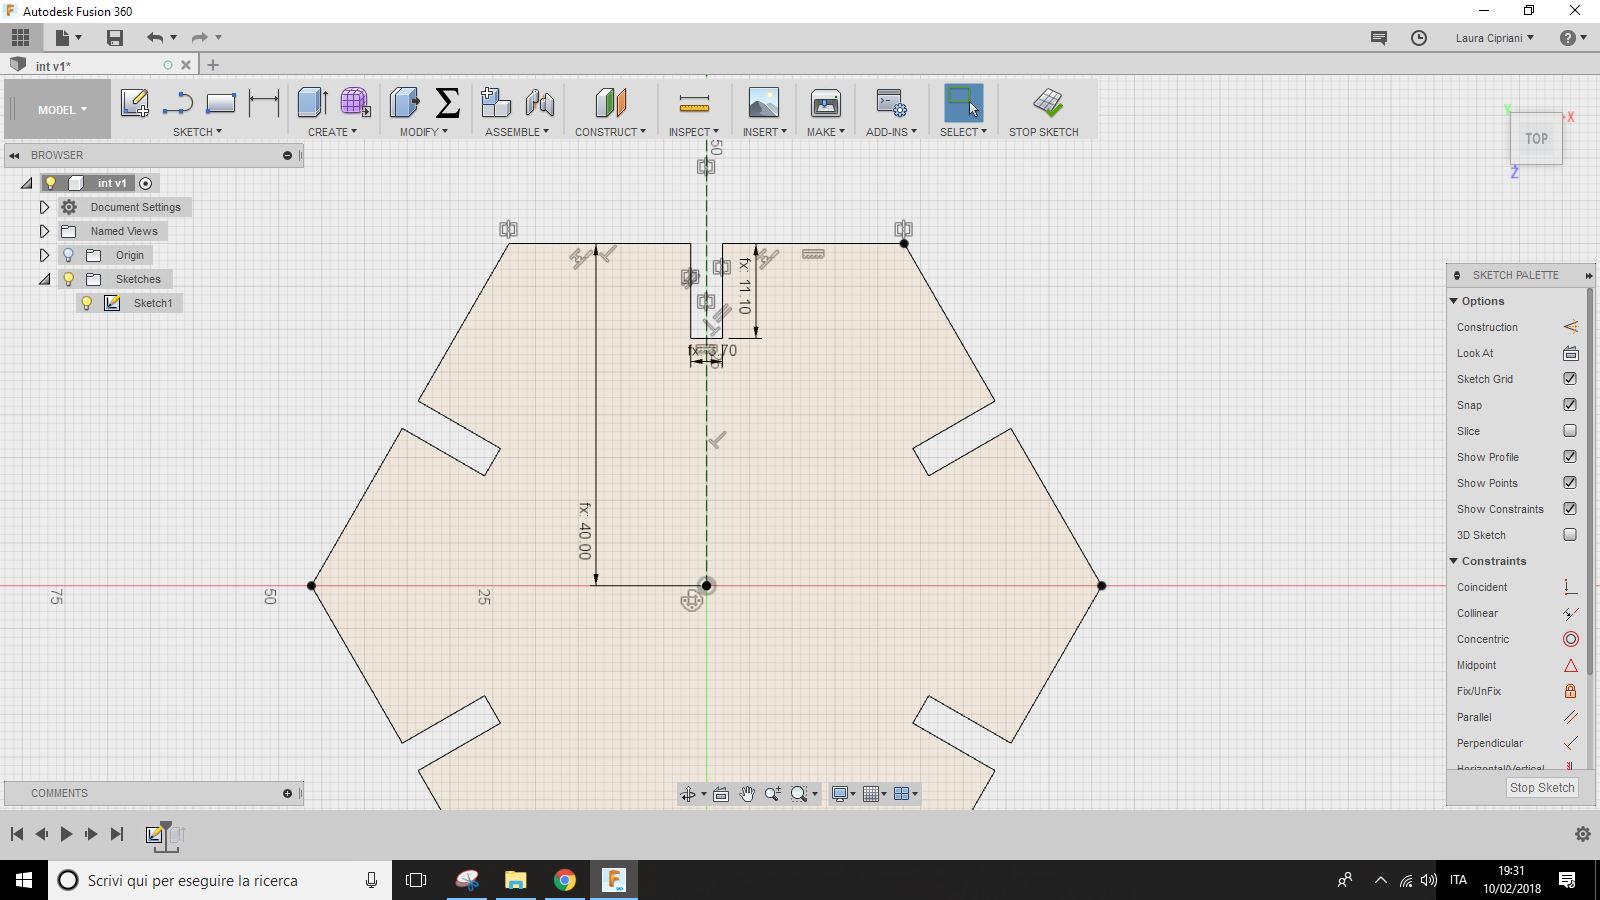 Designed in this way I was able to draw pieces of 3, 4, 5, 6 and even 12 faces without losing the functionality of the joint.

 Designed in this way you are able to draw pieces of 3, 4, 5, 6 and even 12 faces without losing the functionality of the joint.
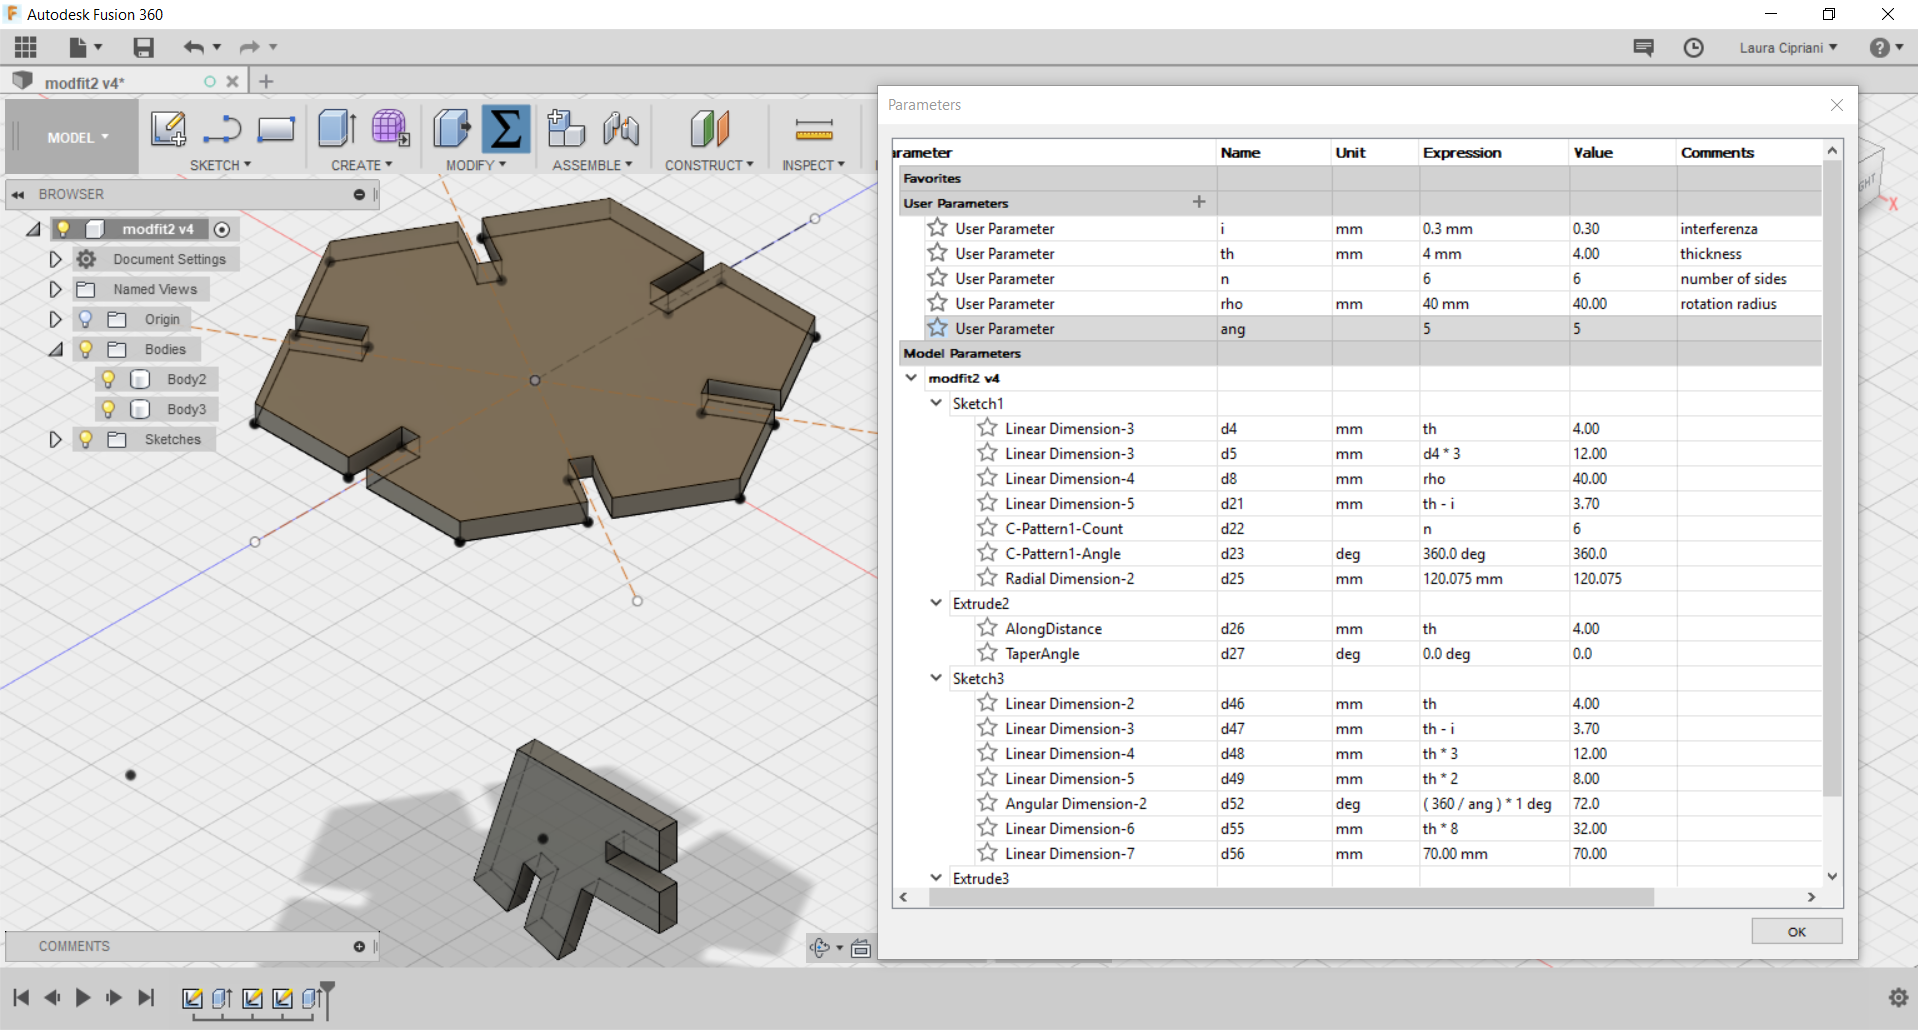
How to do? Follow the screeenshot parameter or open model in Fusion 360
and try to reproduce the same parameters in your sketch.
Designed in this way you are able to draw pieces of 3, 4, 5, 6 and even 12 faces without losing the functionality of the joint.
How to do? Follow the screeenshot parameter or open model in Fusion 360
and try to reproduce the same parameters in your sketch.
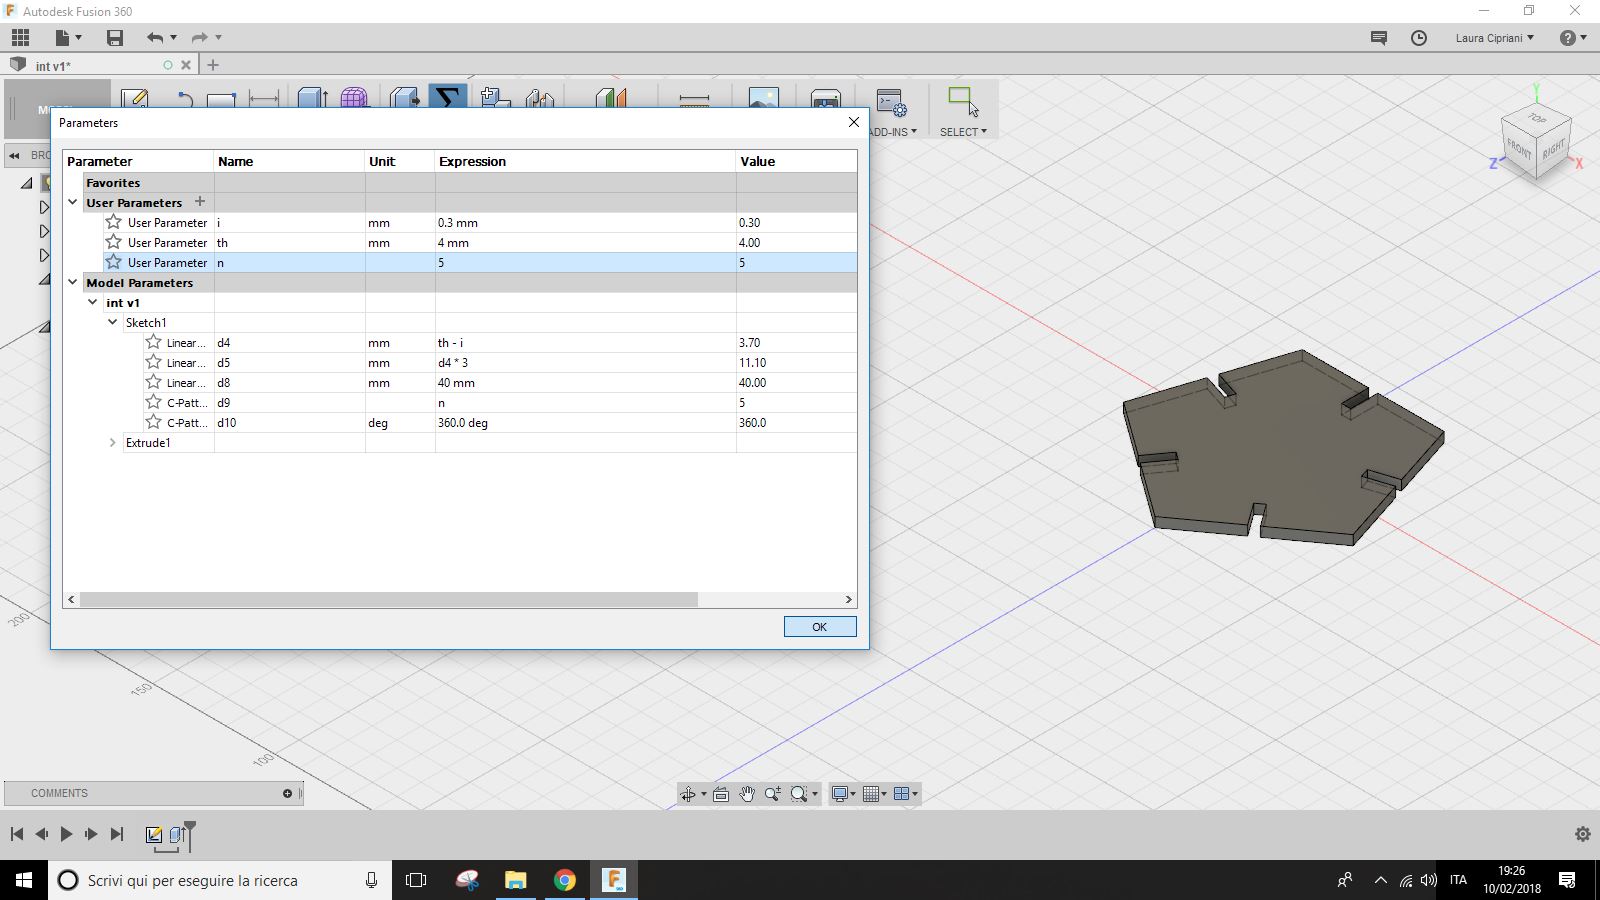
In addition to changing the number of sides and then the shape of the piece (triangle hexagon square etc) you can intervene on the thickness (on the basis of the material you want to cut) or on the dimension of the whole piece.
1.2 Model PART 2
Also for this piece you started setting the joint and putting the other dimensions according to the thickness of the material.
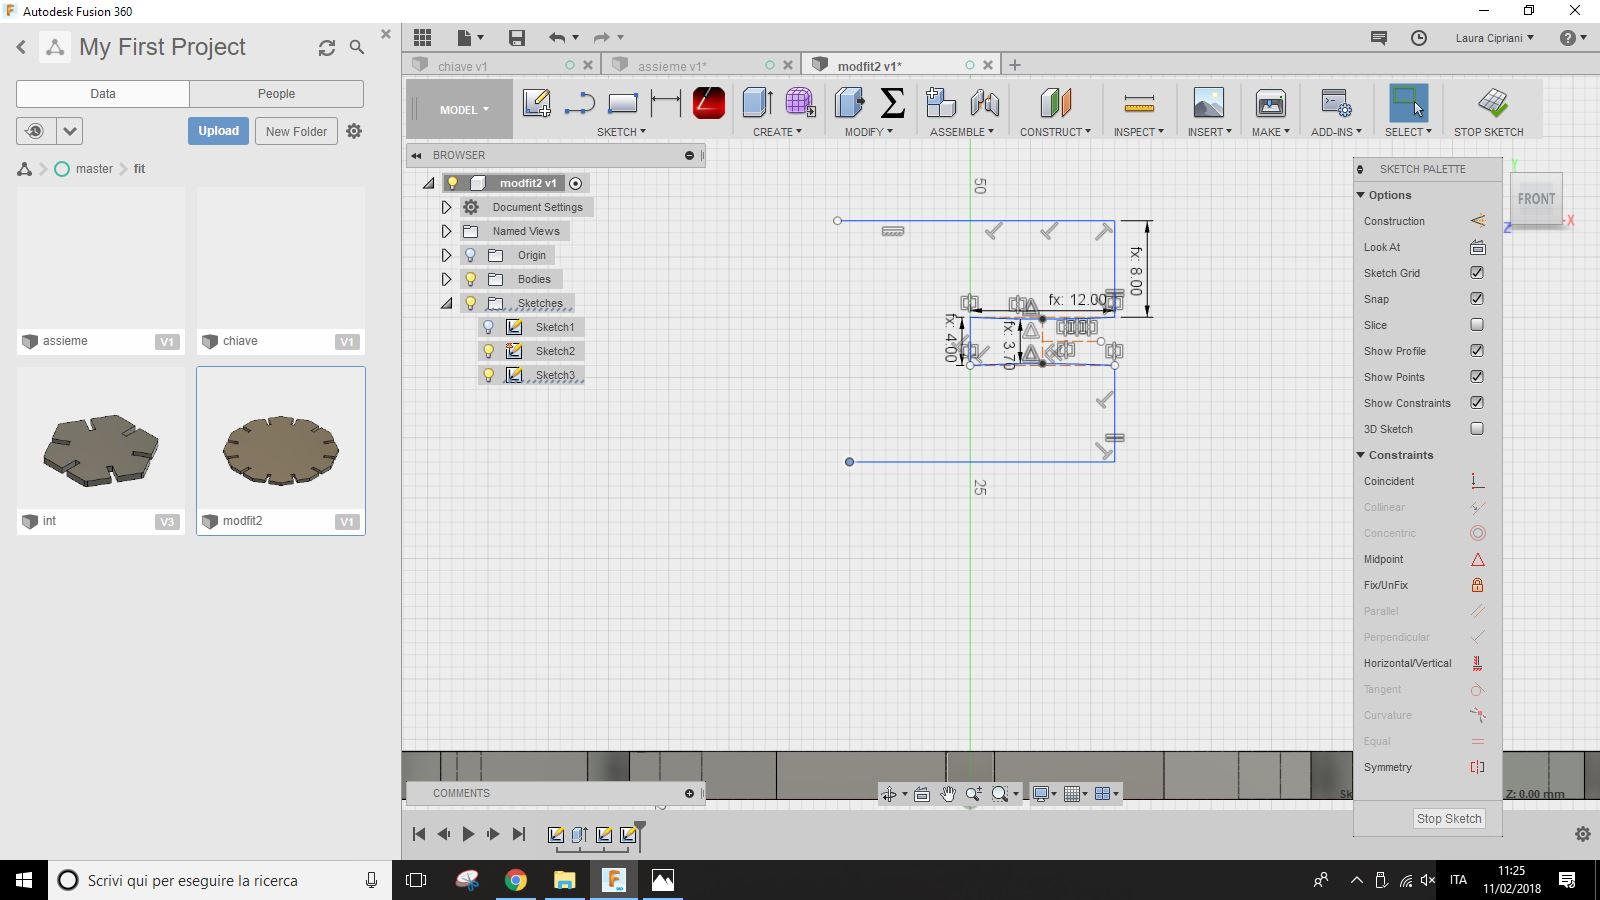 Use the command "mirror"for reflect the part.
 In the following screenshot you will find all the parameters to make the two pieces parametric.
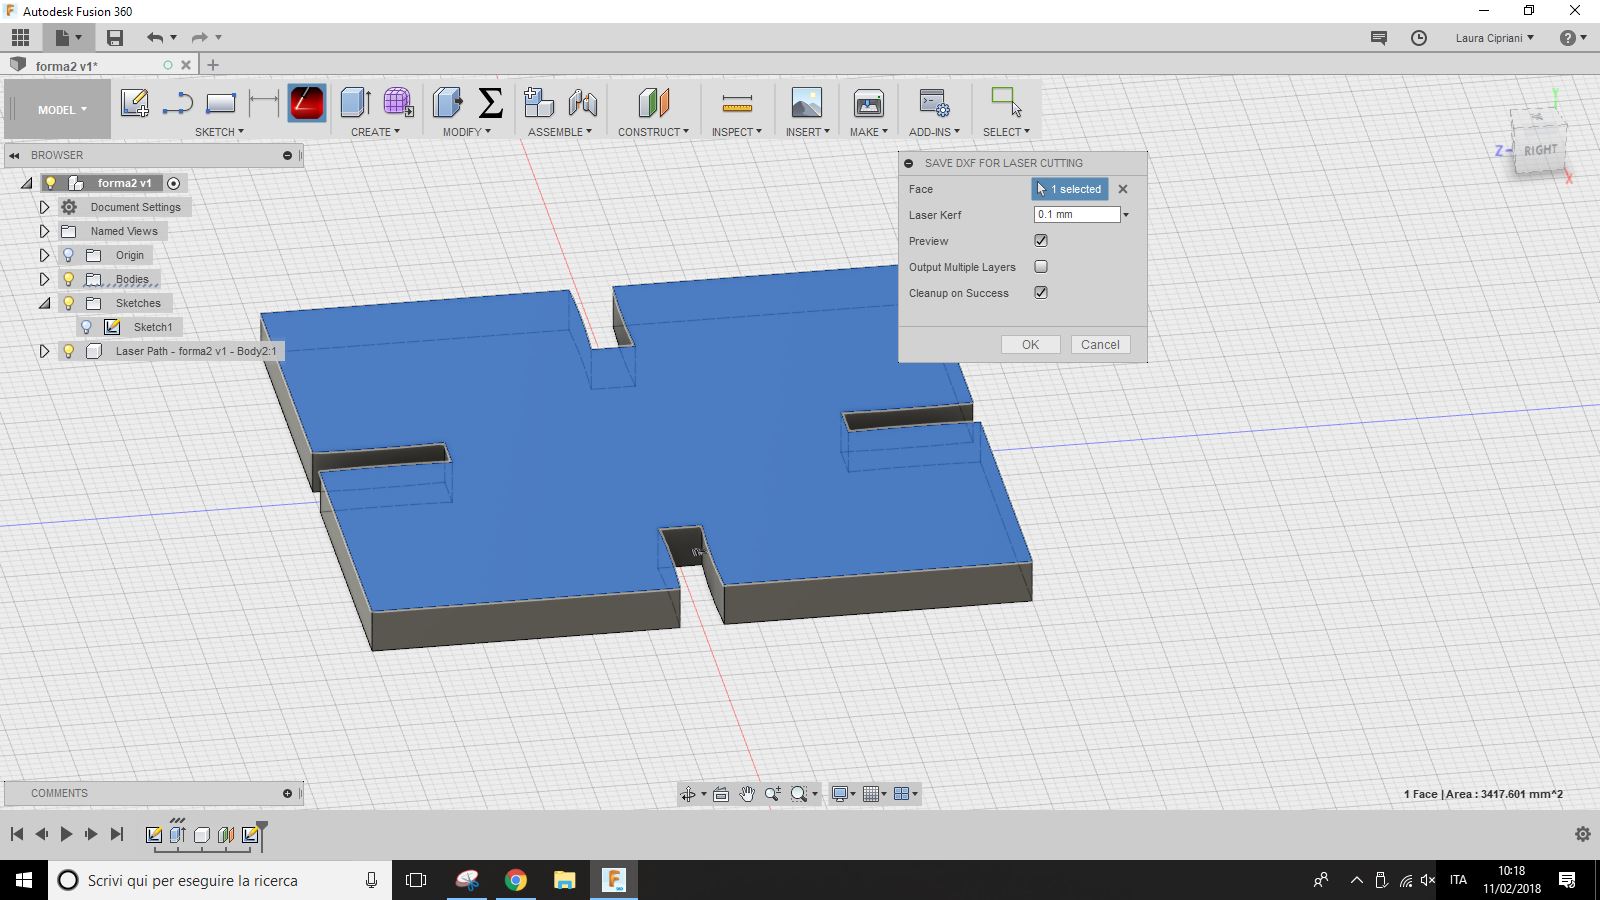
 After this work you can start exporting the pieces you chose to cut with the help of the Fusion 360 DXF FOR LASER plugin. If you do not have this plugin you can export the sketch by right clicking on the name of the sketck and selecting "download .dxf" but remember that the kerf will not be considered.
 You can download MODEL here
If among all the download formats choose "fusion" (.f3d) you can open the fusion model and see all the modeling steps from the history and all the parameters from "modify -> parameters".
1.3 From DXF to Lasercut CAM
When you've got a .dxf file (which is a 2D model) you can proceed with the table setting. You can do this step with a vector graphics program (inkscape) or with a 3d modeling program (Rhinoceros). This depends on where the laser cutting machine drivers are installed.
At this LINK you can see the "starter kit" of Vectorialism (Italian lasercut service) it is very usefull for understand the logic of cutting and engraving layer in different softwarer: Inkscape, Blander, etc.
Then you can choose material: remember what thickness you made the joints! you can choose to cut on a 4 mm thick plywood. In this case you can considered 0.1/0.2 mm of kerf (interference of lasercutter) when you exported 3D model from Fusion 360 with the plugin DXF for Laser.
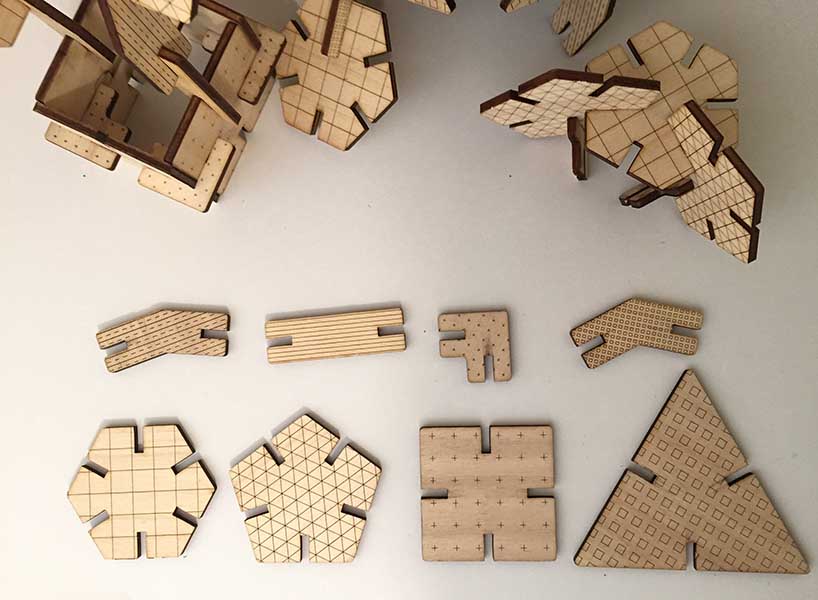
When you are in Rhinoceros, Autocad, Inkscape or other softare and work on DXF file, you can try adding on the different pieces one or more "patterns" (there a series of line that you can group in a single layer and process then like "engraving vector line" when you prepare file for the lasercut).
This is useful to make them more recognizable for children.
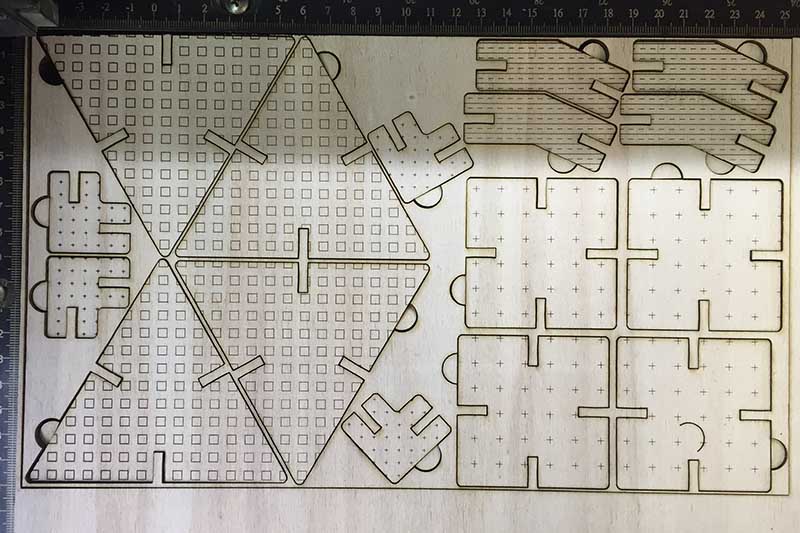
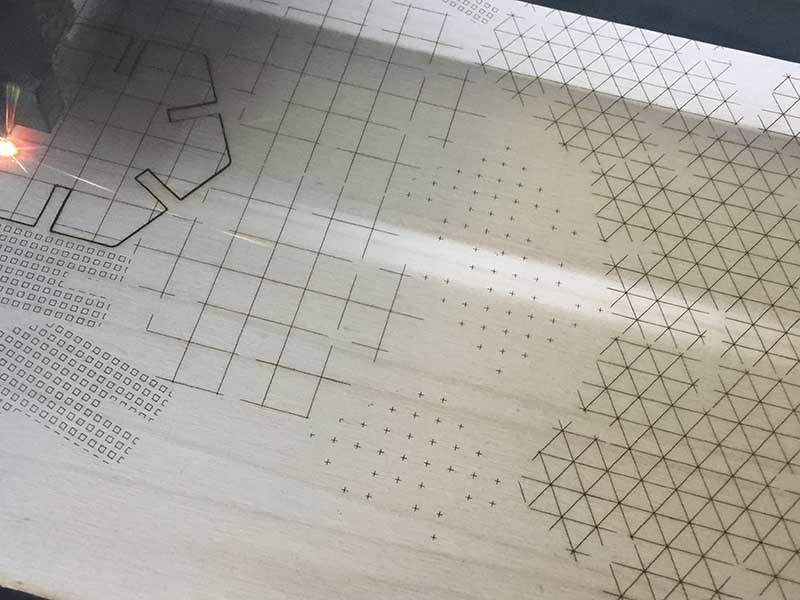
when the dxf file is finished, and you are ready to set the parameters for laser cutting, you will have to divide the pieces on three levels: the first one you will have to make to the machine will be to engrave: within this level there are the decorations you have inserted to recognize the pieces.
 The second level will be that of cutting: this will allow you to cut the pieces so before executing it make sure that there are no double lines and that all shapes are complete.
You can add a third one that cuts a square around all the cut shapes, to have a small square where to put the pieces together once you have finished playing.
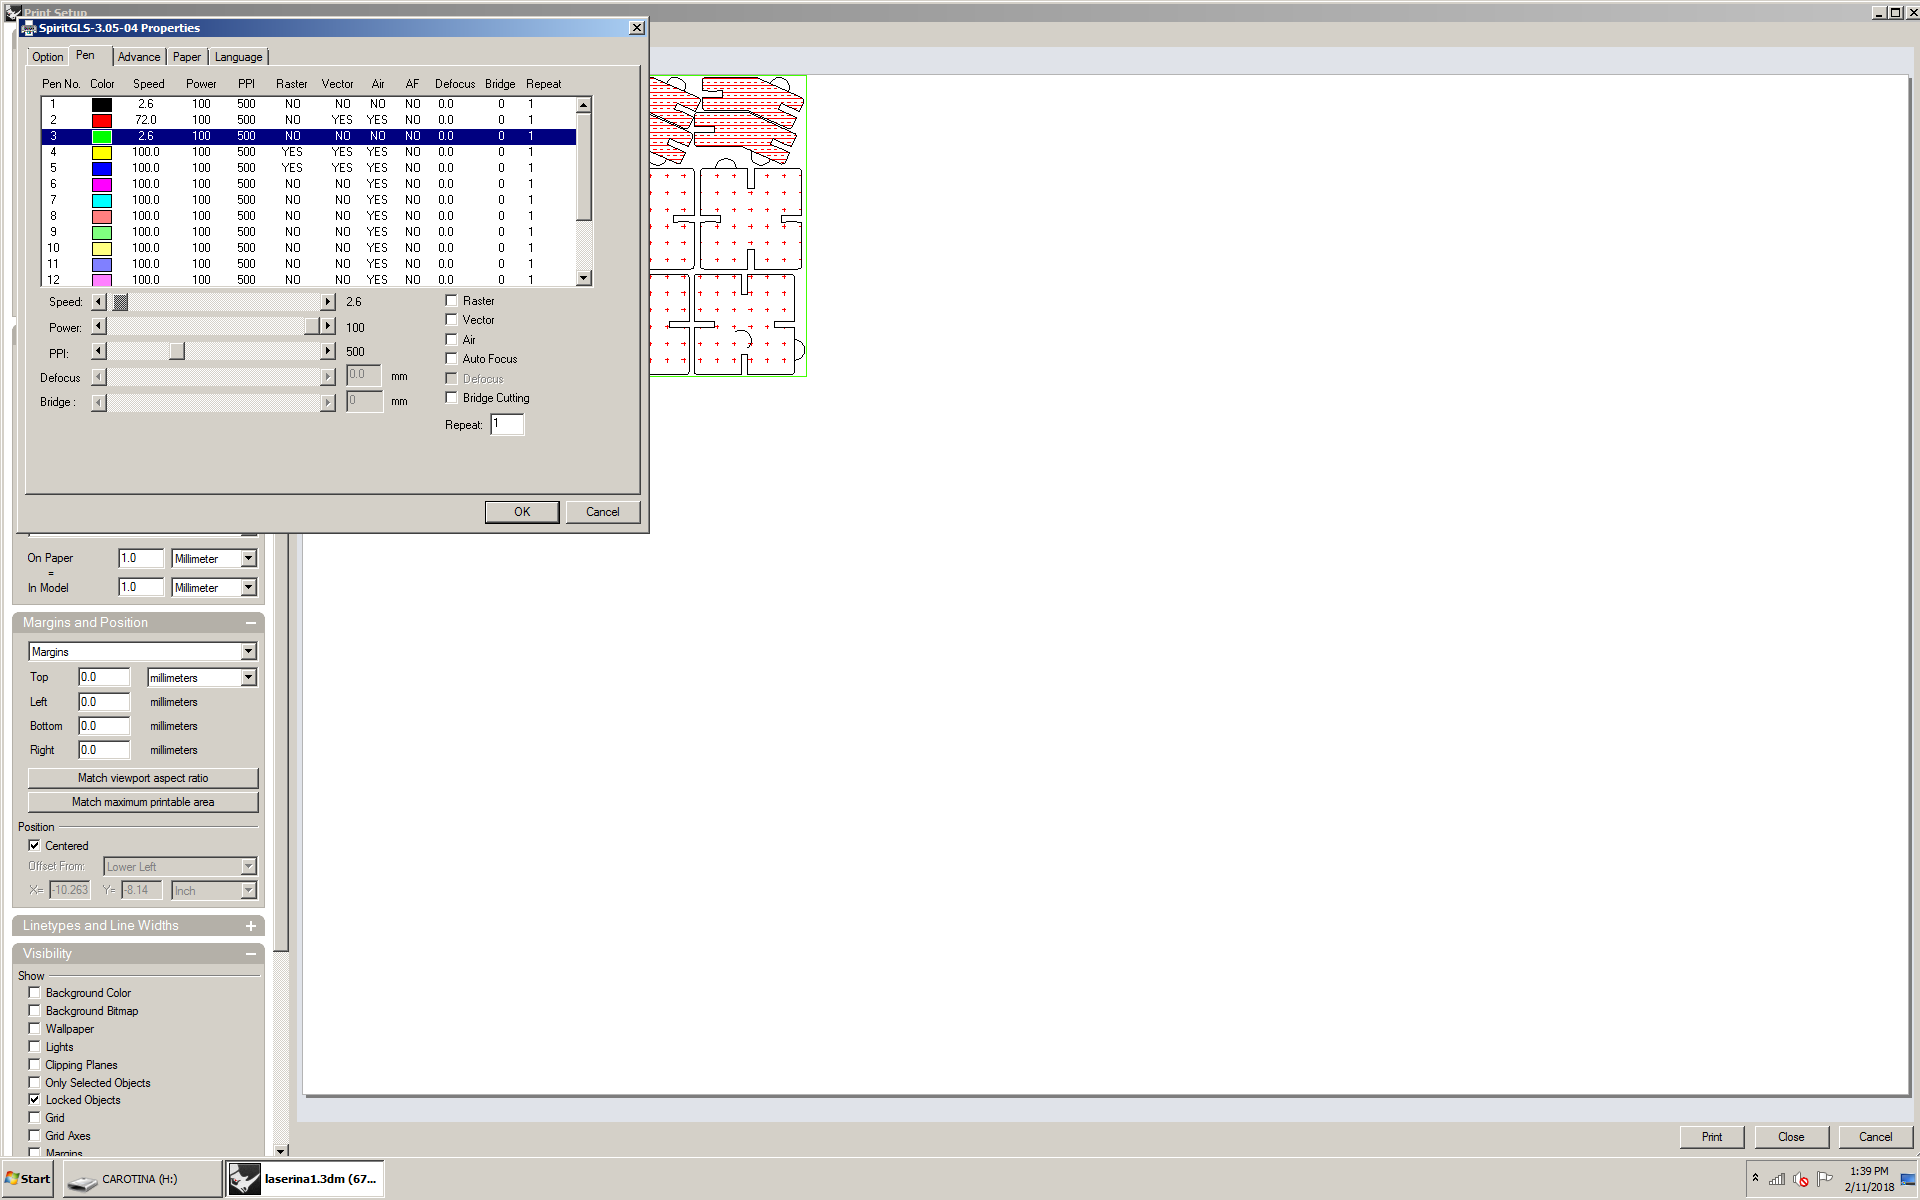 Afterwards you can assign speed and power to every single level. The values to be assigned in this process depend on the type of machine you have. Before cutting everything you can try to cut the samples to understand the power and speed best for the material you have chosen, and what kind of interference to consider.
 There are many tests for your laser cutting machine, like this one.
During the nesting you can also made some semi-circles useful for extracting the pieces, these can serve as a basis for the packaging.